

Blog
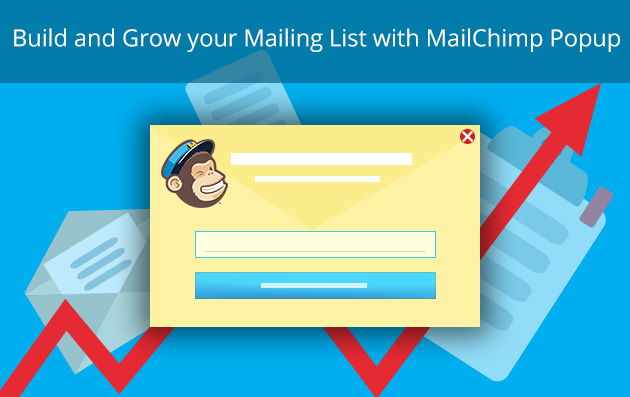
Build and Grow your Mailing List with MailChimp Popup
Do you use MailChimp for segmentation, automation, analytics and/or for other online marketing purposes? Or do you plan to start using it? In both cases, the information presented below will be useful to introduce and lead you step by step to the realization of email marketing campaigns through Popup Builder and MailChimp. Specifically, we would like to focus your attention on the advantages you can have by the integration of two powerful online marketing services. Herein, let’s get into the details of how to make use of MailChimp account and MailChimp popup integration. Also, we will see how it can benefit the process of customer segmentation.
The Benefits of this Integration
To begin with, the integration of these two powerful services favors email marketing campaigns due to the versatile MailChimp features and powerful popup features. The all-around MailChimp features manifest themselves in the opportunity to include many fields to ensure proper segmentation of subscribers and the popup features come up as a powerful strategy to attract attention.
Thus, if you wish to make a popup with a MailChimp form, you should connect a MailChimp popup to a MailChimp account. Once connected, start the creation of a popup that will include MailChimp fields to fill in and to subscribe. It’s a brilliant way to get additional information about your subscribers and to target them according to various criteria.
Start Building Your Mailing List
In order to start running successful email marketing campaigns, you should build your mailing list. With that said, we mean that you should give an incentive to your visitors to subscribe. For example, offering free ebooks, guides, podcasts etc., as well as making discount offers for subscribing to an e-commerce website’s newsletter can serve as good incentives. Or else, you can invite like-minded people to join your website newsletter in order to be a part of your community. Given the incentive, your plausible future customers will be tempted to give their personal information.
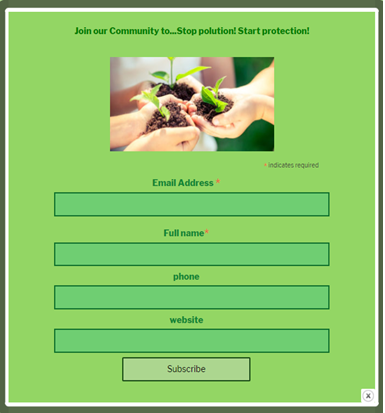
Did you notice that the form represented in this popup isn’t a standard one? In addition to the most common “email” and “name” fields, the form supposes filling in additional information. Via the “phone” and “website” fields you can target your subscribers according to their country, interests, and occupation. There are also other important fields you can include such as text, number, date, address, zip code, image, etc. You can also change the field labels. And all of these functionalities are available through the flexible MailChimp features.
MailChimp popup creation
Would you like to make a smart popup like this to build and grow your mailing list? If your answer is “Yes”, let’s pass through the process of MailChimp popup creation step by step and illustrate important features with screenshots.
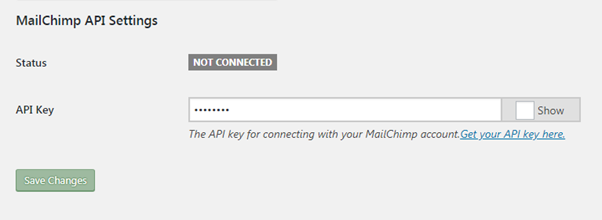
- The first step you should take is to go to MailChimp popup settings and connect your MailChimp account to the popup by writing down the API Key.
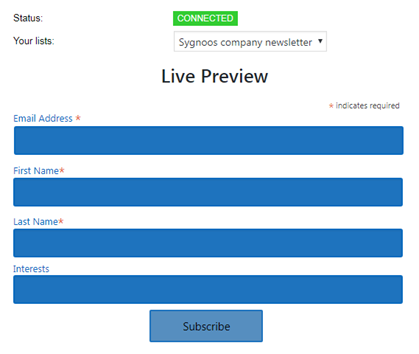
- Afterwards, go to “Add new popup” field and click on MailChimp popup icon. Here you are! Fill in the necessary fields to make a MailChimp popup. In the “MailChimp options” section, select one of your MailChimp lists from the drop-down menu to be integrated into your popup. In our example, “Sygnoos company newsletter’ list has been selected.
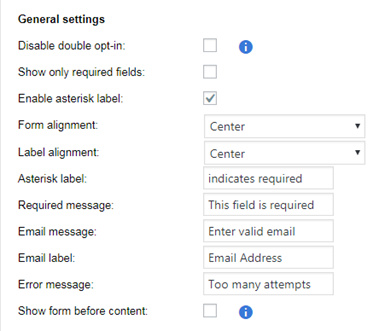
- Then, you can pass on to the “General settings” section to set up some structural configurations to determine the appearance and the functioning of your MailChimp popup.
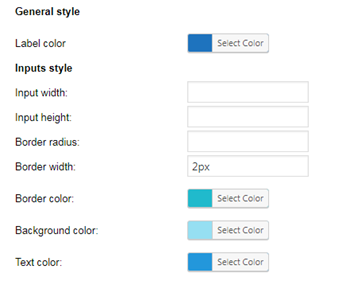
- Certainly, you will have particular style preferences in relation to your MailChimp popup. Thus, in the “General style” and “Inputs style” sections you can put in certain values to determine input and border dimensions. You can also choose color hints for the label, border, background and the text to be submitted into your MailChimp popup fields.
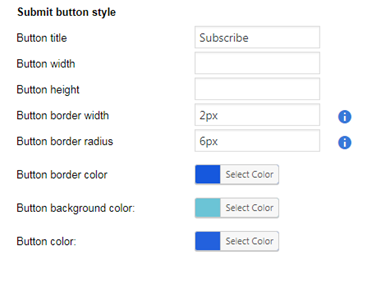
- In addition, you can also design your “Submit” button. For instance, you can change the button title and set up button dimensions. You can select a color for the border, the background and the text of the button.
Actions after Successful Submission
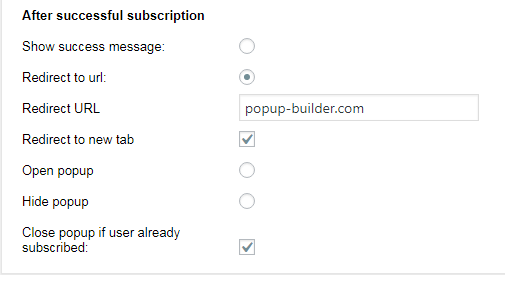
- After successful subscription, show your subscribers a success message with a sample text like this: “You have successfully subscribed to our mailing list” or redirect them to another page. There is an option to redirect your subscribers to a new tab for the convenience of navigation. With the “Open popup” option, you can open a new popup after a successful subscription by choosing one of your popups from the drop-down menu. You can also close the popup when the user has already subscribed.
In Conclusion
Thinking of building and growing your mailing list with the opportunity to target your subscribers? MailChimp popup is one of the best solutions. Through the creation of a MailChimp popup, you can include additional fields and outsource valuable information about your subscribers. Your visitors will subscribe to your site’s news and updates by providing their emails and other personal information. Accordingly, you will be able to segment them according to their age, gender, place of residence, interests and other criteria. This is just the case when information is power you get through the integration of these smart online marketing services.