

Blog
Build and Grow your Mailing List with AWeber popup
Are you aware of the privileges you can have by integrating Popup Builder and Aweber services? Firstly, by using Aweber service you get an opportunity to make beautiful forms with the templates offered by the service. Then, you can segment your possible customers by adding custom fields into forms. And then, you can represent a form in a popup window using Aweber popup extension.
How to Make an AWeber popup
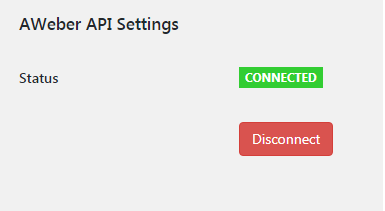
Thus, if you want to make a popup with an Aweber form, first fill in Aweber credentials and connect your Aweber account in the Aweber popup settings.
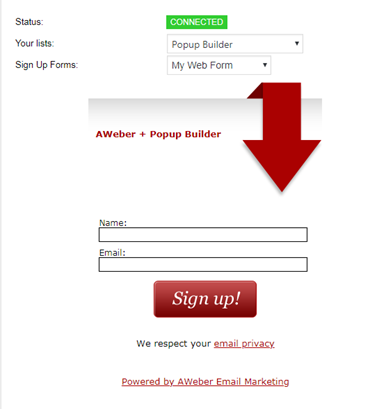
After connecting, pass on to the “Add new” section of Popup Builder plugin, choose Aweber popup from various popup types and start making the popup. Here you can choose one of your Aweber lists from the dropdown menu in front of the “Your lists” section. As a result, the selected Aweber list will be fully integrated into the popup. All you will need to do further is to set up other necessary configurations for making an attractive popup.
Additional Fields
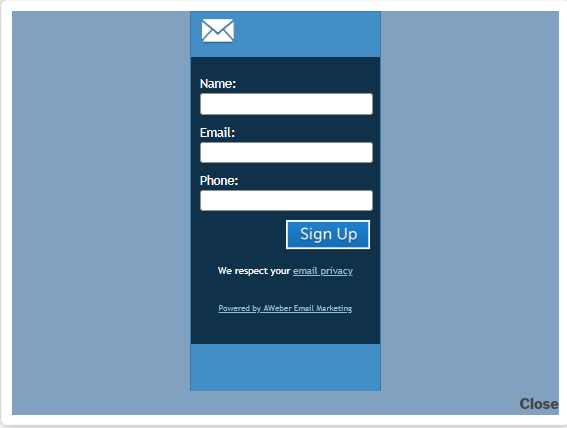
Additionally, make use of the opportunity Aweber service provides and include other segmentation criteria to the template, such as phone, date of birth, website, interests, etc. that can later be used to target possible customers. Availing of this opportunity will make email marketing operations even more successful. And if you wish to make the Aweber form attract more attention, integrate it into a compact popup window. Wish to make your popup more influential? Then make use of various popup events.
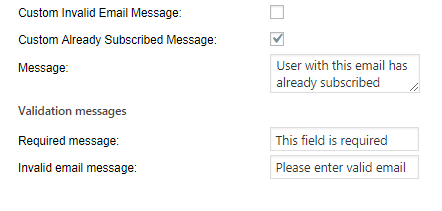
Now, let’s explore specific Aweber popup options. In the screenshot below you can see the messages you may wish to convey to subscribers. Subscribers may provide the same email twice. In this case you can show them a message to let them know that the email has already been added to the submissions list. Or else, if subscribers have missed out filling in a required field, you can remind them through a message that the field is required. And in case of providing an invalid email, you can ask them to enter a valid one. By the way, the messages are custom, so you can change their text.
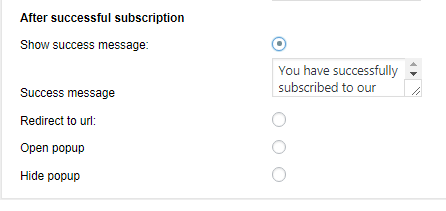
Actions after Successful Supscription
After a visitor has subscribed successfully, you can perform one of these four actions.
- Show him/her a success message. This is a custom message, so you can change the text.
- Redirect him/her to another url.
- Open one of your other popups, or
- Hide the popup altogether once your visitor has already subscribed.
Summary
If you want to add subscribers at the same time availing of the chance to segment them, the application of an Aweber popup is a brilliant solution. Making an Aweber popup, you get an opportunity to add one of your Aweber lists into a compact popup window. There the visitors of your website will fill in personal information. Once your site visitors give their emails and other information about themselves, you will manage to target them based on these criteria. Thus, making use of the powerful integration of Aweber and Popup Builder online marketing services will give you the power to segment your possible future customers.