

Blog
Invite Your Visitors to Get in Touch with You Through an Engaging Contact Form Popup!
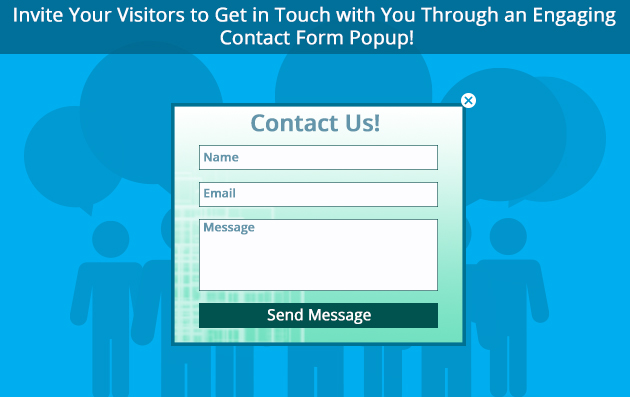
Have you ever thought of making your contact form more appealing? Well, almost every website has a “Contact us” button somewhere on its landing page. The latter enables its visitors to connect with site owners in case of any questions or suggestions. However, if you want to encourage visitors to get in touch with you, consider making a contact form popup. Then, place it on your site to appear at the right moment. For example, it would be more reasonable to show the window after a visitor has got familiar with your products and services.
Really!
How can one have questions or suggestions unless they know about your activity? Thus, a lot of features can be given to a contact form popup to make its use as efficient as possible. The versatile popup functionalities give you a chance to have the desired impact. Apart from general popup settings, contact form popup also manifests itself in its specific options. The configuration of the latter will give a special charm to a popup.
Explore contact form options
Getting a lovely popup like this is not a tough task. You just need to go to the “Add new” section and select the “Contact form popup” type. Then, you will need to set up all the features out there to create a fascinating and a polite popup. However, in the scope of this article, we would like to focus our readers’ attention on the specific contact form options.
Set Message Labels!
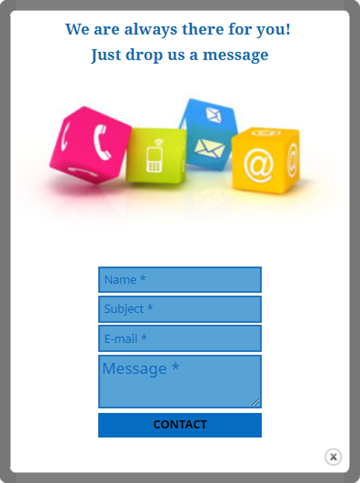
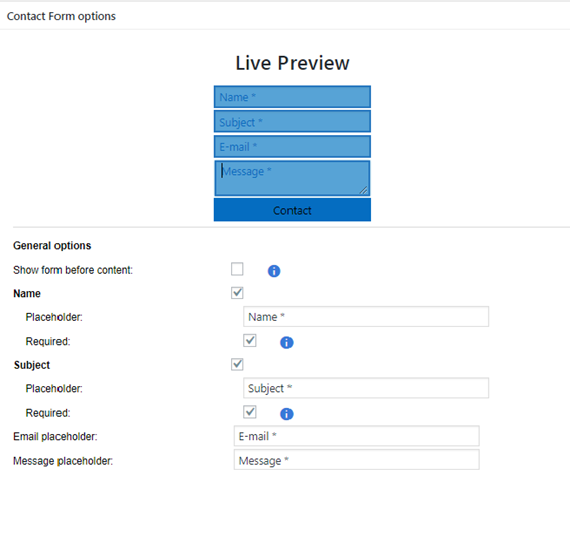
As you can see in the screenshot, you can set the “Name”, “Subject”, “E-mail” and “Message” placeholders. You can change these placeholders if you wish. For instance, you can change “Name” placeholder to “First name” or write “Leave your message” instead of “Message” placeholder. Also, you can mention some fields as required. Based on a website owner’s preference, the form can be shown either before or after popup content. Now, let’s look at the next screenshot. Here, you can set up how certain messages, such as an error message, required field message, and invalid email message should appear before the users filling out the form.

Configure Input Styles!
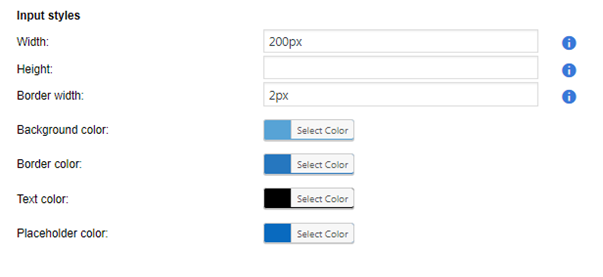
In the input styles section, you can configure input dimensions and colors. You can give colors both to the input background, border, text and the placeholders like “Name”, “Subject”, “E-mail” and “Message”.
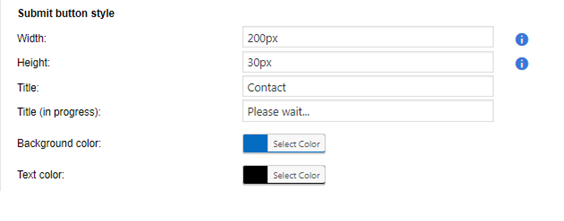
Set Submit Button Styles
Correspondingly, in the “Submit button style” section you can set the dimensions, as well as background and text colors of the button. Also, you can change the “In progress” title to anything else.
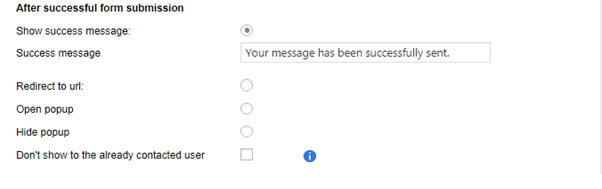
Action to perform after Successful Submission
Now, you need to determine where to redirect users after they have submitted the form successfully. You can show them a success message, redirect to another URL, open another popup or hide any popup window altogether. By the way, the text of the success message is not a fixed one, so you can change it. Suppose a user has already contacted you once. In this case you can choose after how many days you prefer to show the popup to the same user again.
To Wrap it up
Every prudent site owner considers representing company credentials on a space visible to its visitors. But if you wish to make the form more appealing, consider making a popup window in order to attract attention and call visitors to action. The contact form popup specific options are pliable enough to ensure the fascinating look of the window. And through the general popup functionalities, you can determine when the window should appear or what action should trigger its display.